
How to Replace a Gas Dryer Thermal Fuse Safely
A blown thermal fuse kills your dryer's heat. Here's how to replace a gas dryer thermal fuse safely in Saratoga CA, with tools, tests, and real costs.
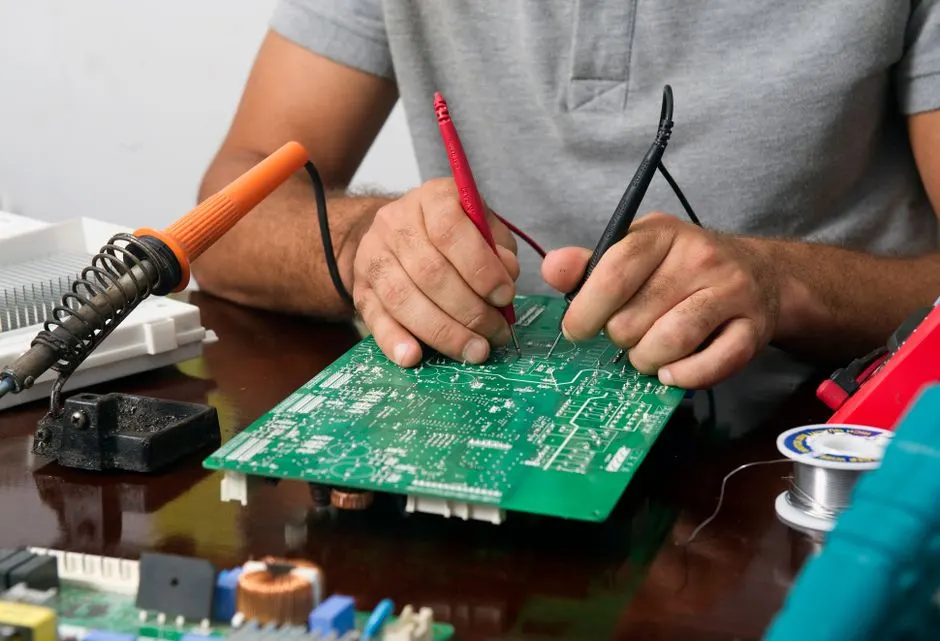
Replacing a gas dryer thermal fuse safely means cutting power and gas, testing the old fuse for continuity, swapping in an exact-match fuse, and fixing the airflow problem that blew it in the first place. The job takes 45 to 90 minutes with a multimeter and a nut driver, and the part costs $10 to $25 in Saratoga. If you skip the airflow fix, the new fuse will blow again within a few cycles.
We are Gas Dryer Repair Pros, and we replace thermal fuses across Saratoga every week. This guide walks you through the safe DIY version, the mistakes that cause repeat failures, and when it makes more sense to hand it to us.
Why a Gas Dryer Thermal Fuse Blows
A gas dryer thermal fuse blows when the exhaust temperature inside the dryer exceeds roughly 220°F to 250°F, which is the fuse's one-time trip point. The fuse is a fail-safe, not a wear item. It sacrifices itself to stop a fire.
In our experience, the cause is almost never the fuse itself. It is restricted airflow. Lint packed in the blower housing, a crushed flex duct behind the dryer, or a vent run clogged with years of lint all trap heat. The drum keeps spinning, the igniter keeps firing, and the temperature climbs until the fuse opens the circuit.
Here is what we find on Saratoga service calls, roughly in order of frequency:
- Clogged vent line or exterior vent hood packed with lint and debris.
- Crushed or kinked 4-inch flex duct behind the dryer.
- Lint buildup inside the blower wheel and housing.
- A failing blower wheel that no longer moves enough air.
- Restricted airflow from a vent run longer than 25 feet with too many elbows.
One more thing worth knowing: on many Whirlpool, Kenmore, and Roper gas dryers, the thermal fuse sits on the blower housing and is wired in series with the motor. When that fuse opens, the dryer will not start at all. On other models, the fuse only kills the heat. Either way, the fix is the same.
Is It Safe to Replace a Gas Dryer Thermal Fuse Yourself in Saratoga?
Yes, replacing a gas dryer thermal fuse yourself is safe if you shut off both the gas valve and the electrical supply before you touch anything, and if you never bypass the fuse. The fuse is a safety device. Jumpering it out is how dryer fires start.
The gas side of the job is simpler than most people expect. You are not opening the gas valve, the burner tube, or any gas-carrying component to reach the thermal fuse. On most Whirlpool-built models, the fuse is behind the lower front panel or the rear access panel, nowhere near the gas line. You are working on a 120-volt control circuit, not the burner.
That said, three conditions mean you should stop and call us instead:
- You smell gas at any point. Leave the house and call from outside.
- The fuse has blown two or more times in the same year.
- You cannot find the fuse or the wiring harness does not match the replacement part.
If you are not comfortable working around a gas appliance at all, that is a reasonable position. Our Gas Dryer Thermal Fuse Replacement Saratoga CA service covers the fuse, the airflow correction, and a safety check on the burner and vent in one visit.
Tools and Parts You Need Before You Start
Gather everything before you pull the dryer out. A second trip to the hardware store mid-job is how people end up rushing and skipping the safety steps.
You need:
- Multimeter with a continuity setting
- 1/4-inch and 5/16-inch nut drivers, plus a Phillips screwdriver
- Putty knife or a stiff plastic scraper for panel clips
- New thermal fuse, exact model match
- Vacuum with a crevice tool, or a dryer vent brush kit
- Work gloves and a drop light or headlamp
The fuse itself runs $10 to $25 at Saratoga-area appliance parts counters in 2026. Buy the fuse by your dryer's model number, not by appearance. A 250°F fuse and a 220°F fuse look identical and are not interchangeable. If you cannot read the model plate, photograph it and bring the photo to the parts counter.
While you have the panels off, pick up a replacement vent kit if your flex duct is crushed or plastic. Rigid or semi-rigid metal duct is the only duct we install. Plastic and foil flex duct is a fire hazard and it clogs faster.
Step-by-Step: How to Replace a Gas Dryer Thermal Fuse Safely in Saratoga CA
Follow these steps in order. Do not skip step one.
- Shut off the gas. Turn the gas shutoff valve behind the dryer a quarter turn so the handle is perpendicular to the pipe.
- Unplug the dryer. Pull the cord from the wall outlet. Do not rely on the breaker alone.
- Pull the dryer forward. Give yourself three feet of working room. Protect hardwood or tile with a moving blanket.
- Disconnect the vent. Loosen the clamp and pull the duct off the back. Expect lint.
- Open the cabinet. On most models, remove the two screws at the bottom of the front panel, then lift the panel off its clips. On rear-access models, remove the back panel screws instead.
- Locate the thermal fuse. It is a small white or silver rectangular component, about an inch long, mounted on the blower housing or the exhaust duct with two wires attached.
- Test the old fuse. Set your multimeter to continuity. Touch a probe to each terminal. A good fuse reads near zero ohms and beeps. A blown fuse reads open, no beep. That confirms the diagnosis.
- Photograph the wiring. Take a picture before you pull the wires. Reversing them is uncommon but not impossible.
- Remove the fuse. Pull the two spade connectors straight off, then remove the mounting screw.
- Install the new fuse. Mount it, reconnect the wires, and tug each connector gently to confirm it is seated.
- Clean the blower housing and vent. Vacuum the blower wheel, the housing, and the duct opening. This is the step that keeps the new fuse alive.
- Reassemble and reconnect. Panels back on, vent reconnected and clamped, dryer pushed back with a gentle bend in the duct, not a kink.
- Restore gas and power. Turn the gas valve back parallel to the pipe, plug in, and run a timed heat cycle. You should have heat within 60 to 90 seconds.
Total time for a first-timer: 60 to 90 minutes. A second attempt on the same model takes 30.
Testing the New Fuse and Checking for Other Faults
After the new fuse is in, run the dryer on a timed heat cycle and check three things: heat, airflow, and exhaust temperature.
Heat should arrive within 90 seconds. If the drum tumbles but stays cold, the fuse is not your only problem. On a gas dryer, no heat after a fuse replacement usually points to the igniter, the flame sensor, or the gas valve coils. We see this often enough that we keep all three on the truck. If your dryer runs but never heats, our Gas Dryer Not Heating Repair Saratoga CA team can test the full ignition circuit in one visit.
Airflow is the second check. Hold your hand at the exterior vent hood while the dryer runs. You should feel a strong, steady, warm stream. A weak or intermittent flow means the vent is still restricted, and the new fuse is on borrowed time.
Exhaust temperature is the third. A cheap infrared thermometer at the vent hood should read 120°F to 160°F on a normal cycle. Anything pushing past 180°F at the hood means the airflow is still too low.
If the fuse blows again within a few loads, stop replacing fuses. Something upstream is wrong, and the fuse is doing its job by telling you so.
Common Mistakes That Cause a Thermal Fuse to Blow Again
Most repeat thermal fuse failures trace back to one of five mistakes. All of them are avoidable.
Replacing the fuse without cleaning the vent. This is the big one. The fuse is a symptom. If you do not restore airflow, the new fuse sees the same heat and opens just as fast. In our experience, a fuse replaced without a vent cleaning fails again within 5 to 20 loads.
Using the wrong fuse rating. A 250°F fuse in a dryer spec'd for 220°F will let the cabinet run hotter than the manufacturer intended. Match the model number.
Bypassing the fuse. Never. A jumper wire turns a $15 part into a house fire risk. We have seen it twice in Saratoga, and both dryers had scorched lint in the cabinet.
Leaving crushed flex duct behind the dryer. Pushing the dryer back against the wall folds the duct and cuts airflow by half. Leave a gentle loop.
Ignoring the blower wheel. A blower wheel with broken or worn fins moves less air even when the vent is clear. If the wheel looks chewed up, replace it.
One more pattern worth flagging: if your dryer sits in a garage or an unheated utility room, cold intake air can slow the warm-up and change how the fuse behaves. We see this in Saratoga Hills Gas Dryer Repair calls where the laundry setup is in a detached or semi-exposed space. The fix is usually a vent and airflow correction, not a different fuse.
When to Call a Professional
Call a professional if the fuse has blown more than once, if you smell gas, if the dryer is more than 12 years old, or if the vent run is long enough that you cannot verify airflow from the outside hood.
We handle the whole job: we test the fuse and the ignition circuit, clean the vent and blower housing, verify exhaust temperature at the hood, and check the gas connections before we leave. If the fuse failure was caused by a worn blower wheel or a failing motor, we diagnose that on the same visit instead of sending you back to the parts counter.
For homeowners who want the airflow problem solved permanently, our Gas Dryer Vent Cleaning Saratoga CA service clears the full run from the dryer to the exterior hood, including the transition duct and the hood flapper. That is the single most effective way to stop thermal fuses from blowing.
If you would rather not work around a gas appliance at all, that is a fair call. We do this every day, and we are set up for it.
Frequently Asked Questions
How do I replace a gas dryer thermal fuse in Saratoga CA?
Shut off the gas valve and unplug the dryer. Open the front or rear panel, locate the fuse on the blower housing, test it with a multimeter, and swap it for an exact model-match fuse. Clean the vent and blower housing before reassembling. The job takes 45 to 90 minutes.
Is it safe to replace a gas dryer thermal fuse yourself in Saratoga?
Yes, if you shut off both gas and power first and never bypass the fuse. You are working on a 120-volt control circuit, not the gas burner. If you smell gas or the fuse has blown twice, stop and call a technician.
Why does my gas dryer thermal fuse keep blowing in Saratoga California?
Restricted airflow causes nearly every repeat failure. Clogged vents, crushed flex duct, and lint-packed blower housings trap heat until the fuse trips. Cleaning the full vent run and blower housing usually ends the cycle. If it still blows, the blower wheel or motor is likely failing.
How much does gas dryer thermal fuse replacement cost in Saratoga?
The fuse itself costs $10 to $25. A professional replacement with vent cleaning typically runs $150 to $280 in 2026, depending on vent length and access. DIY saves the labor but not the vent cleaning, which is the part that prevents repeat failures.
Will my dryer run with a blown thermal fuse?
On many Whirlpool, Kenmore, and Roper models, no. The fuse is wired in series with the motor, so the dryer will not start at all. On other models, the drum tumbles but there is no heat. Both mean the fuse needs replacing.
Get Help with Gas Dryer Repair in Saratoga
If the fuse blew once and the vent is clear, you can handle it. If it blew twice, or you would rather not open a gas appliance, we will take it from here. We replace the fuse, clean the vent, and verify the burner and airflow before we leave.
Call Gas Dryer Repair Pros at +16693329106 to schedule a thermal fuse replacement or a full safety check in Saratoga.